Exclusive Shed of the year Vouchers Loading...


I love sheds Obvious thats why Im here I reckon that building a garden shed should be in the Top Ten Things to do Before You Die list Especially if its going to be a totally unique construction So given this opportunity thank you Uncle Wilco to wax lyrical about my shed letting the world know about how I have spent hours lovingly crafting and caressing occasionally swearing at every square inch youll have to forgive me if I dont stop typing till my fingers go numb Ok If you can stand to read this through most appreciated and Ill see you on the other side P P P P P
THE STORY SO FAR…. It started in the summer of 04. We had just moved here, our fifth relocation in a dozen years, and this was our first property with enough garden space to build in…Game on!!…..
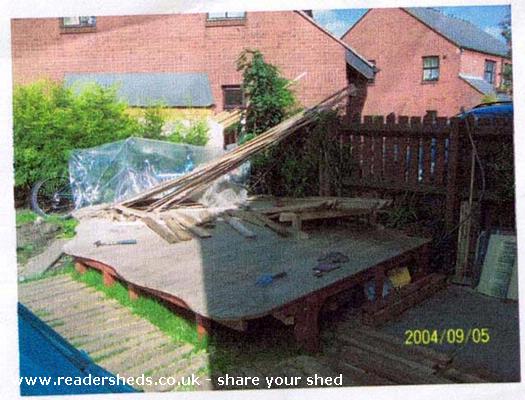
The next-door neighbours (Nichola and Kate, very nice couple) were constructing a huge wooden “extension” to their house. DIY building outdoors is an excellent icebreaker for conversations over the garden fence. An instant rapport was established, we very quickly made friends, and in due course they offered me scavenging rights to their off-cuts, over-stock and discards. Most of the timber came from damaged pallets, which had to be dismantled and de-nailed. Using the 3”x2” lengths to construct the base framework, and the six foot, inch thick planks for the decking floor, a raised platform was assembled to fit in around the angled fence. At this stage I had enough re-claimed screws saved-by to make sure it all stayed together. I really, really don’t like spending money (they say it has something to do with the Yorkshire breeding!), so it was essential that this shed cost as little as possible, financially as well as environmentally. I’m really chuffed that every single piece of this cabin has been constructed with either re-claimed or re-cycled materials, Oh…Ok, not every single piece, some things need cash….roofing felt, wood preservative, screws, hinges, and then I suppose you could put electricity usage into equation, but as my power tool collection consists of (ancient) drill, jigsaw, and I only borrowed the table saw for a short while, I reckon my leccy usage was pretty low…. You can’t beat a decent handsaw, sharp chisel and a cordless screwdriver. The walls were next. Built, pre-fab style, separately in sections then secured into place on the decking. I Put together 3”x2” braced stud for the frame-work, clad on the outside with (pine?) planks from the lids of Chinese import crates (cheers Dad), separated, de-nailed and edges planed down to create an overlap, ship-lap style.
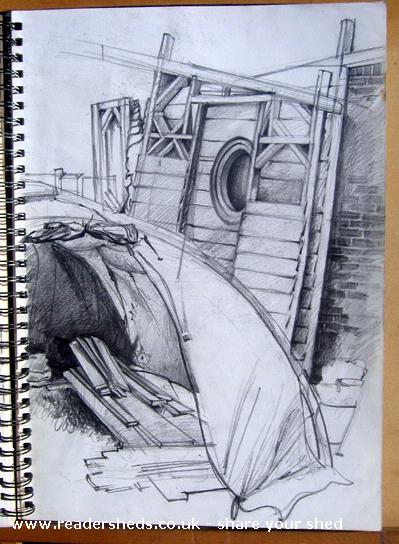
First wall up was the doorway (south) end; then, as and when the materials appeared, the other 5 walls followed section by section. Sadly, the photos of the early stages of construction are now lost, gobbled up and corrupted by a system crash on an old P.C.
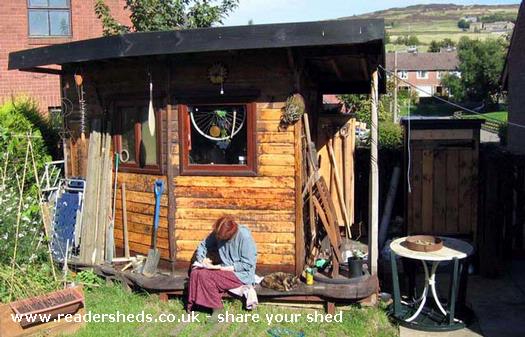
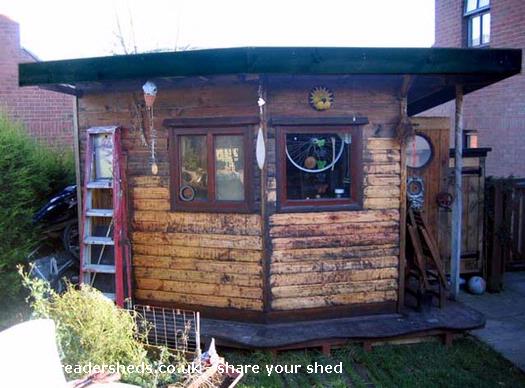
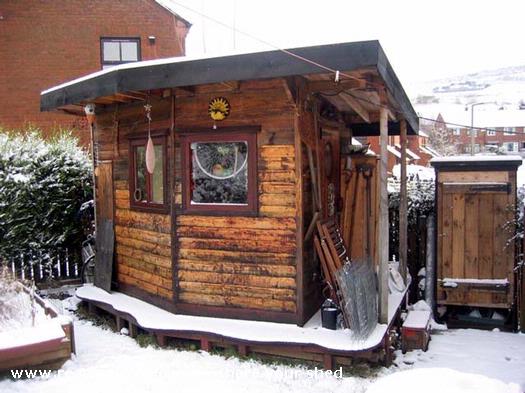
Even though I had initially drawn out a detailed plan for the construction, I had to be flexible enough to change the original idea according to the quantity of building material readily available. As I have no transport of my own, I was totally relying on the good nature and generosity of our neighbours. Originally the two front walls were meant to be equal in length, both around 8ft wide from the centre line. But, because of my leisurely pace, materials were becoming scarcer on the ground (Neighbours projects were coming to an end). I had to make one side a couple of feet smaller. Which, when the roof went on, created the sheltered doorway area. I hadn’t thought of that originally, and as it happens the semi-covered entrance looks good, and comes in pretty useful t’boot.
Roof-beams came from warehouse shelving re-fit, (cheers Dad for the heads up, and Dave for driving the van), 4”x2”, and just enough length, with a bit of creative joinery, to provide strong enough support for the roof. Roofing material is a bit odd, tongue and groove, half-inch floorboards from an abandoned loft conversion (once again thanks to Nichola and Kate, at this time actually moving out from their house). Once treated with preservative and covered with mineral felt, I’d got myself a semi-waterproof workspace, nearly a year after starting the build…. And even though the roof planks continually expand and contract, depending on the time of year, rippling and stretching the felt, touchwood they will remain waterproof for a few more years to come.
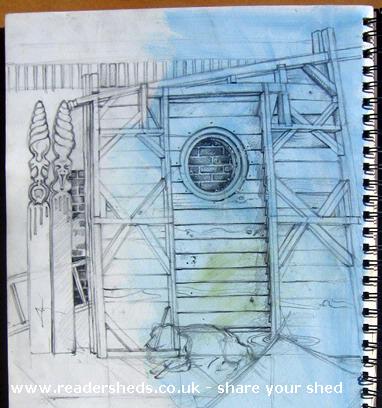
The orange porthole-like window frames were rescued from the Towns’ Roundtable Bonfire, years ago, in the days before the grey-suits that are the Health and Safety Committee decided that the only materials they were allowed to burn would be straw bales.
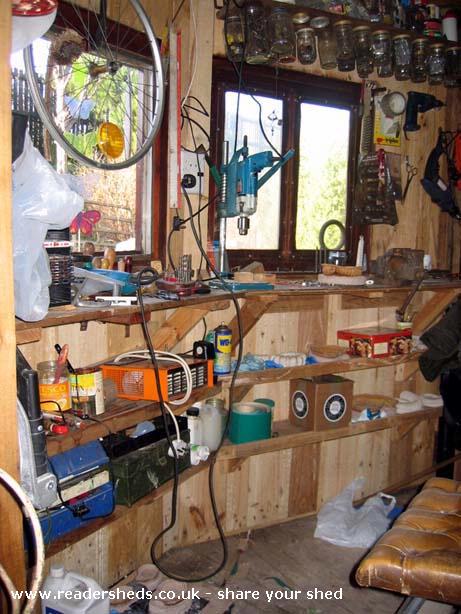
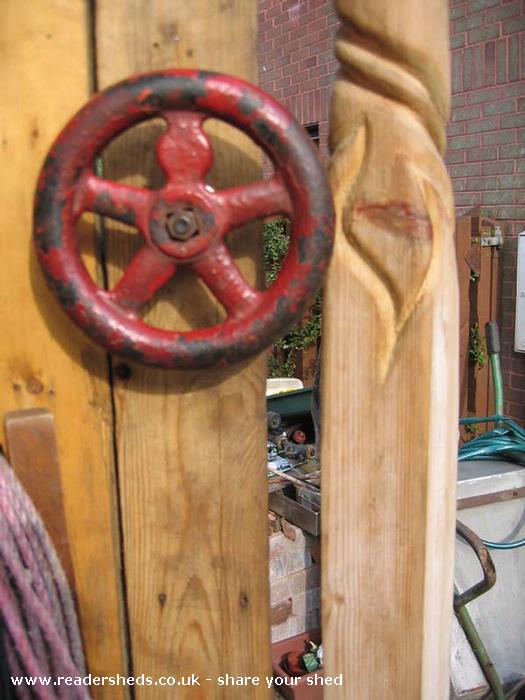
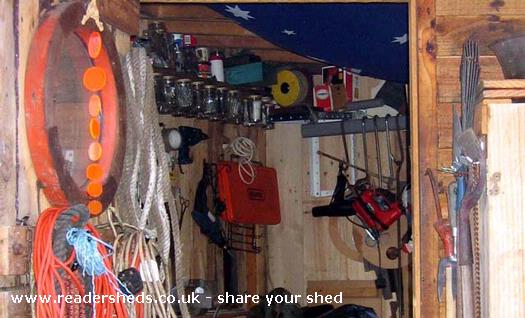
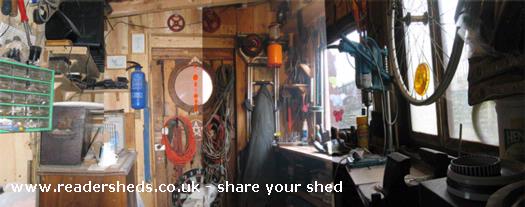
Late October used to be a great time for us ”Sheddies” round here. All the local factories, businesses, industrial estates and the like, donated truckloads of wood for the town bonfire. The park became a great meeting place in the weeks leading up to plot night. We builders, artists and craftspeople of all shapes and sizes conspired to liberate the more useful and interesting looking bits and pieces before the big day. Great times sadly missed. The windows are glazed with off-cuts of Perspex (thanks Mick), apart from the front square framed window. This was a double-glazed unit, until I managed to smash one of the glass panes, found in a skip. The reason for the other front window being in two sections was because of the random sizes of the available odds and ends of Perspex. The poles that pretend to support the porch used to be “No ball games allowed” signs sunk into the grass verges around the estate. Once the local yoof had had their fun, snapping them off the concrete base, using as goalposts and then leaving them abandoned in the woods for months, I was able to rescue, remove the offensive signage, strip the paint and incorporate them into the shed. (Ssshhhh, don’t tell the suits) I started the spiral carving ages ago, will be finished when I get A Roundtuit. Big Red Door handle, one of three re-located from a semi derelict mill. They used to be water valve openers on those huge red wheels coiled with a high-pressure water hose. Liked this one in particular because it looks like a man in a circle, very Da-Vinci…. Internally the walls are clad with what was left from the Chinese crate lids. Fixed vertically they create a two inch airspace between outside and in. Should’ve put some insulation in there whilst I had the chance, oh well…. Apart from a good splashing or two of wood preservative and a fair big squeeze of sealant, that’s about it for the main build.
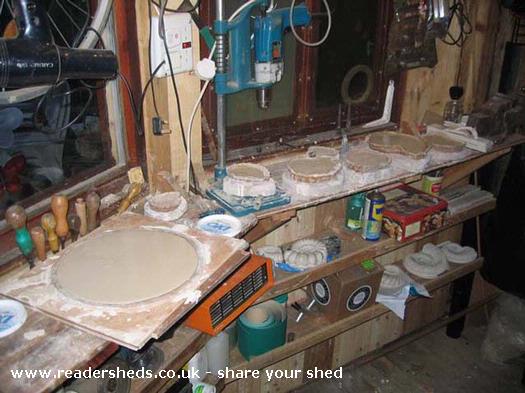
The internal fixtures consist of 30’s office desk, tallboy from the 50’s/ 60’s and my own-made, shelves etc…
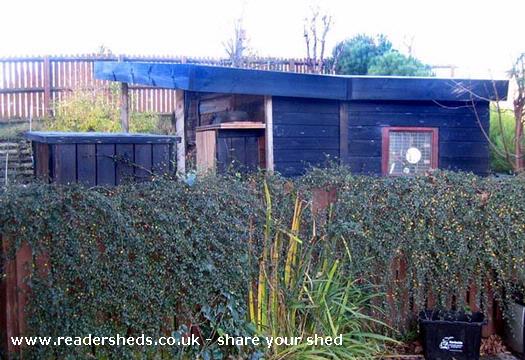
As time passed, in an attempt to clear the shack of extraneous pots of paint, garden tools, junk etc I added the outside, wall mounted storage cupboard. The baby shed (named BogShed) soon followed. It’s amazing how quickly a clear shed space can fill up with stuff. One last thing before it’s daft-O-clock and the repetitive strain kicks in, during the summer months the southwestern face is a real sun-trap. Family, friends, animals can be found basking on the front balcony. Soaking up the rays, whilst I’m ferreting away on the latest project, in and out, listening to the best Trojan Dub styling (or Radio 4, and on the odd occasion, Radio 2) on the old twin cassette boom box, downing one or three tinnies of sweet amber lubrication. Roll on summer!!!!!! There, all done, the story so far, did you make it all the way through? Cheers! I mean it. There are so many more ins and outs, but believe me, the unabridged version was in serious danger of becoming as long and confusing (but not as well written) as The Lord of the Rings. Hope you enjoy the pics. Any comments would be more than welcome.
All the best to Sheddies everywhere (specially those of you Down Under, great work fellas.) Mark Bedlam.